Category Archives: articles

How to Install a Browser App on a Phone

Background

A browser application (app) usually consists of a number of files. There are likely to be images (pictures), javascript files, HTML files and others.

If you save a webpage in Internet Explorer (File, Save as…, type: Webpage complete) or in Chrome (Wrench, Save page as…, type: Web Page Complete), you get a HTML file AND a folder with lots of other files.

Setting up a browser app is similar. You need to setup the file, the folder, and all of the files in the folder. Then, you can go to the “web” page.

You don’t really go to the web, you access it locally on your phone (or PC or iPad or …). It doesn’t cost you any internet access fees or any data download fees. It doesn’t rely on the web server being up. It isn’t limited by the speed of an internet connection.

The easiest way to set up all of the files and folders (some apps have more than one) is to arrange them all on your desktop computer (Windows, Mac, Linux, …) and then copy the entire “tree” of files and folders to your phone.

The easiest way to arrange them all is to have them in a ZIP file that you can expand using the already ZIPped paths.

All of the phone apps on this site come as a single ZIP that you can expand and copy to your phone.

The Process

1. Expand the ZIP somewhere.

For example, in Windows:

a. Right click the ZIP and choose “Extract All”. You’ll see something like

b. Click “Extract”. A new Explorer window will open like

2. Connect your phone to your computer so you can copy files.

With Nokia phones, I find it easiest to use a USB connection and “Mass storage” mode. This avoids using Nokia’s OVI software and just causes the flash drive of your phone to appear as another drive on your computer. Copying is then a simple Windows Copy and Paste. The computer may take a minute to recognise the phone as an external drive if you haven’t connected it before. When it is ready you see

Press the Enter key (to “Open folder to view files”) and another Explorer Window will open. In my case, it looks like:

3. Copy the files.

Keeping with the above examples:
a. Go to the Explorer Window with the expanded ZIP in it.
b. Select the files. If you are lucky it will have a single folder (like “hp67” or “hp29c” etc) and you can right click that folder to select everything. Otherwise, press Control-A (to select all) and then right click one of the items.
c. Choose “Copy”.
d. Go to the phone Explorer Window.
e. Create a new folder if necessary (right click in the right hand side and choose New then New folder, give it a name).
f. Go into the folder where you want to put the files (I use “Greg” for things I’ve added).
g. Right click the right hand side and choose “Paste”. You should see “copying files” for a bit, then it’s done.

4. Disconnect.

a. Safely Remove Hardware. If you are connected using USB: note which drive the phone came up as (K: in the above picture), close that Explorer Window, click “Safely Remove Hardware” at the bottom right of the computer (in the “system tray”), and choose the drive that connects to the phone.
b. Unplug the phone.

4. Using the Application.

a. Run your web browser.
b. Go to the installed page.

For a Nokia phone:
Options, Go to, New web page. You’ll see “http://www.”.
You need to change this to the installed the browser app.

(1) In my case, the phone refers to the flash card as drive “E:”. (Note this is different to what the desktop called it (K:)). You can often find out what the flash card is called by looking at properties of music (or other files) copied on to the phone. These will usually say where the files are stored – such as “E:” or “C:”. So, as far as my phone is concerned, I installed the “hp67” folder in “E:/Greg/”.

(2) In the “hp67” folder are a number of files (and subfolders). One of the files is the one that the browser should display. With my applications this is always “index.html” as this matches what is often used on web servers and the internet. With other browser applications it may be a different file so check any instructions that came with that particular browser app.

(3) When you know the drive, directory, and file; you can change “http://www.” to something like “file://E:/Greg/hp67/index.html” and touch the “Go to” button.

c. Save it in your Favorites / Bookmarks so you never have to remember where it is installed again.

For Nokia:
Touch the 3 lines button and choose “Save bkmrk.”

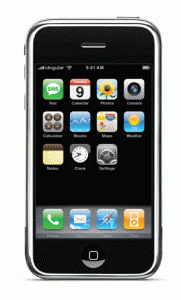
Here is what you should end up with, for an iPhone:

Nokia S60 and Windows

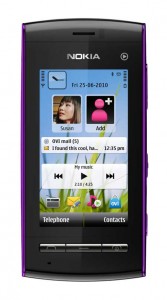
Well, it looks like the end of the line for the S60.

It happened a little while back, whilst I wasn’t noticing, according to wikipedia. The story is “In February 2011, Nokia announced [they will use] Windows Phone 7 as their Primary OS [instead of] Symbian.”

I could be wrong but it does look like Symbian (S60) will fade into obscurity. The article goes on to say that Nokia shed 3000 Symbian staff to Accenture on 29 Apr 11. Accenture must be getting something out of the deal; but it looks like a nice way to give ex-Nokia staff a way to get involved in other development lines.

There is still some potential. Nokia were open-sourcing Symbian / S60 so perhaps we’ll see a dedicated team of enthusiasts supporting it. The catch is, whilst open-source developers are keen, very capable, and often produce better products; their focus is rarely on commercialising the software. It is commendable but it doesn’t result in market leadership. They really are a great bunch of people but, for all the wrong reasons, we are likely to see the mobile phone market become: Apple, Android, and Windows (not in any order).

It will make it easier to develop phone apps and it will be easier to find something that works on your phone. So – despite my sadness – there are pluses too.

Infield Software

Infield was a programming language for handheld computers in the 1990s.

It was originally developed by National Training Services, a Sydney-based company. They later shortened their name to NTS and later still, became Infield Solutions.
The language grew out of an idea from the Managing Director, Peter Mottlee. He wanted a Generic Capture Module that would run on a handheld device and which could be used by different users for different purposes. What was common was data entry and storage.
GCM was further genericised and became Infield.

The following are some screenshots from Infield back then.

The startup screen showing the licensee, and the applications list.

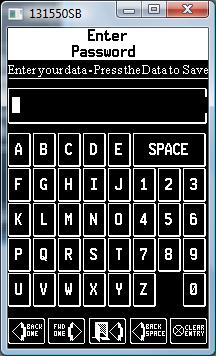
These two are data entry pages: numeric and alphanumeric.

This one is a sample screen showing just some of the things that were possible. It could also integrate with a GPS receiver and store geo-coding information along with information entered by the user. This was a pretty good trick at the time as GPS was still primarily a military system with negligible civilian use back then.

Infield software ran on a range of handhelds including, Symbol, Norand, Husky, and TouchPC.

Scientific Calculators

If you are studying science or engineering you need a scientific calculator. Even maths students need a scientific calculator these days.
These are calculators with special functions like: sine, cosine, tangents, ex, log, ln, and so on. They also cope with a very wide range of numbers such as billionths through to trillions or more. Ideally you have control over when it switches into scientific notation.

The Hewlett-Packard (HP) range of calculators were always very good. They also had “reverse polish notation” (RPN) which sounds strange but which is far more versatile than most calculators. When you need a scientific calculator you often need to string calculations together – when you’ve figured out one part that enables you to work out the next part. RPN is ideally suited to this because you don’t have to know where you are going to get started. Let me give an example:

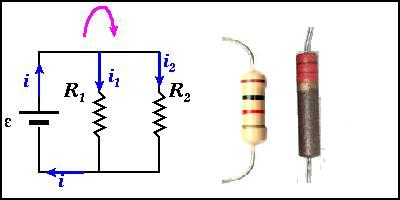
Suppose you have two resistors (electronic components) wired in parallel like this:

You need to know what the combined resistance is.

You know that I = E/R where I is the amount of current in amps, E is the voltage (volts) and R is the resistance (measured in “ohms”).
If you apply 10 volts to the combination:
you’ll get 10 Enter 1000 divide giving 0.0100 amps through the first resistor and
you’ll get 10 Enter 2200 divide giving 0.0045 amps through the second one
If you add the two you get 0.0145 amps.
Given I = E/R, R must = E/I so
If we do 10 swap divide we get 687.5 ohms.
An RPN scientific calculator allows you to carry on from what you just worked out. It is also amazingly straight forward after you have used it a bit.

To do this with a conventional calculator you would need a pen and paper.
The current through the first resistor, R1, is I1 = E/R1.
The current through the second resistor, R2, is I2 = E/R2.
The total current, I1+I2 = E/R1 + E/R2.
The total resistance is RT = E/IT = E/(I1+I2) = E/(E/R1 + E/R2)
= E/E * 1/(1/R1 + 1/R2) = 1/(1/R1 + 1/R2)
At this point you could do 1 / ( 1 / 1000 + 1 / 2200 ) = and get 687.5 ohms.
You need to think it all the way through before you even get started.

I love RPN scientific calculators so perhaps I’m biased (I’ve used one) but I think they are a great way to understand what is happening in the science / engineering rather than just learning some mathematical formulas.

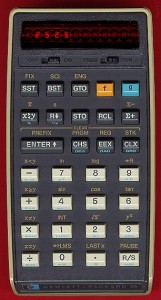
My recommendation for a scientific calculator? My HP67 emulator of course. You can put it in your phone on a laptop on an iPad or a desktop computer. I like having my old favourite scientific calculator right there in my phone at all times. It is nice not having to take anything extra with you.

Failing that, get one of the real HP RPN scientific calculators.

The HP67 and Non-Normalized Numbers

This is an interesting side note for fanatics. You can skip this if you are not a fanatic.

NOTE: If you have a HP97 don’t use non-normalized numbers (NNNs).
The HP97 is a printing version of the HP67. NNNs burn out the print head on a HP97.

The HP calculators used binary coded decimal (BCD) to fit numbers into registers (X, Y Z, T) and into memories.
Internally, numbers were stored in SCIentific notation with a 10 digit mantissa and a 2 digit exponent. When you add a sign to the mantissa and to the exponent you end up with 14 BCD digits: SMMMMMMMMMMSEE. S is 0 if the mantissa or exponent is positive and 9 if negative.

14 BCD digits occupy 15 display positions as the decimal point is always right of the first mantissa digit and, on the HP67, a decimal point occupies a display position of its own.

BCD defines meanings for 0-9 but each four-bit nibble can also hold other values (0x0a – 0x0f in hexadecimal notation).
The display uses values outside of 0-9 to display the messages you see such as “Error” and “Crd”.

Nibble values in registers display as: 0-9 = 0-9; A = “r”, B= “C”, C=”o”, D=”d”, E=”E”, F=” “.

The 14 BCD digits occupy 7 bytes of memory. Each program step occupies 1 byte (even if it is 3 keystrokes).

One way of creating NNNs was to key in program steps, write these to a mag card and then write a data header over the start of the card (f W/Data, insert card, turn the calculator off midway through the write). You could then load the card back in, as data, and see what appeared in the storage registers.

A more interesting way involved getting the program counter outside of steps 000-224 (it would point into a storage register) and then keying in program steps there.

See also:
Holy Joe
my notes from 22 Dec 2005

How To Install a Nokia S60 Series Application

  1. Run Nokia’s OVI Suite to connect your phone to your computer
    e.g. Start / Programs / Nokia / Nokia Ovi Suite
  2. Open a file window showing the downloaded .wgz file.
    I use: hold down the Windows key and press E
    You can also get this by clicking “My Documents” or similar.
    Make sure you move to the folder with the .wgz file so you can see it.
  3. Have both Ovi and the .wgz file displayed.
    This involves shrinking each window enough so that both fit on the screen.
  4. Connect your phone to the computer.
    Ovi supports Bluetooth and USB.
    My computer doesn’t come with blue tooth but the phone did come with a USB cable so I use that.
    After a while a picture of your phone will appear in Ovi.
    Give it a little longer to settle down, then
  5. Drag the .wgz file over the top of the picture of your phone in Ovi.
  6. Follow the instructions on your computer and your phone.
    These will say things like press OK to install.
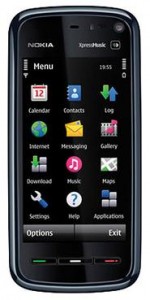
  7. I found my new application in Menu / Applications / Install. apps. on a Nokia 5230 phone.
    You can then move it to wherever you want in the menu structure.

Problems

  1. If you don’t have Nokia Ovi Suite
    You can download it free from Nokia’s website.
    I used www.nokia.com.au/support/download-software/nokia-ovi-suite
    If that doesn’t work for you and you can’t find it anywhere obvious, try google-ing download nokia ovi suite.

HP65


I never had a HP65 but it was what my HP67 was based on and wow it looked like a great calculator.

The keyboard layouts were very similar too.

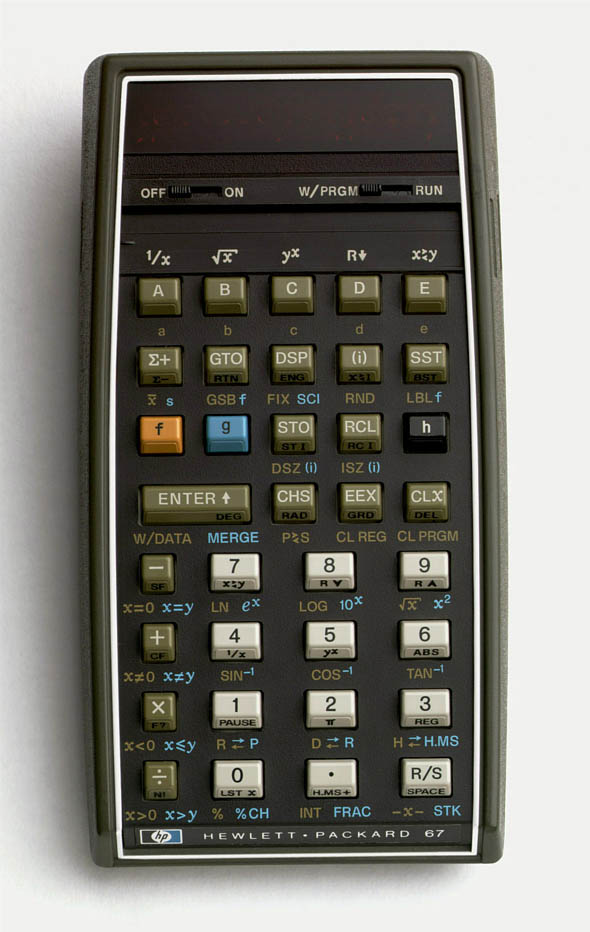
The f, f-1, and g keys became f, g, and h.

There was extra writing added because the new g key was no longer labelled f-1 :
– on the HP65 f 9 was square root, f-1 9 was un-square root i.e. square
– on the HP67 f 9 was square root, g 9 was square
It was no longer obvious so HP added x2 next to the square root sign.

The writing also moved from above their keys to below their keys.

Aside from a few minor changes on the second row, the keys remained in familiar positions.

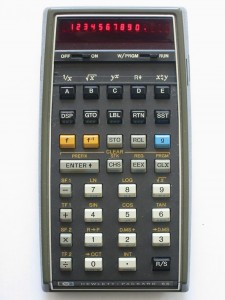
You can see a HP67

So, why did people upgrade from the HP65 to the HP67?

There were lots of really good things about the HP67 and just as many reasons. A couple of obvious ones were: more memory and bigger programs. But, for many, these weren’t reasons to ditch the great HP65 – merely reasons to get a HP67 too.

HP25 Calculator


The HP25 was the first HP calculator I had. I got the 25 just before the HP25C came out and Hewlett Packard swapped it over for the newer model. They were great.

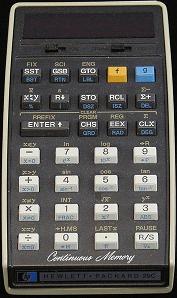
The HP25C had “continuous” (CMOS) memory. When you switched the calculator off it remembered the programs you had entered into it. The HP25 (and all the others of the time) forgot the lot when you switched them off.

You can get a java based HP25 emulator from
www.hpmuseum.org


It’s not a HP25 but you can also use our free hp21 calculator emulator.

Or, if your interest includes something more up-market, consider our hp67 calculator emulator.

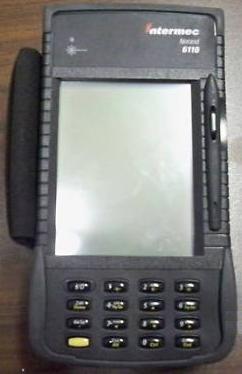
Norand 6110 Handheld Pen Computer


Operating System: Windows CE, Windows 95 or MS-DOS
Display: 240 (width) x 320 (length) pixels (4.75″ diagonally) touch screen, 4 level gray scale LCD with backlight.
Size: 20.6 cm x 11.2cm x 5.8cm  (8.1” x 4.4” x 2.3”, L x W x H)
Weight: 800gm (28 oz) including battery
RAM: 8MB (standard), 16MB or 32MB
CPU: 100MHz AMD 486
Expansion: PC card slots